OBS Virtual Camera Guide
Open Boradcast Software (OBS) is a free and open source software for streaming, screencasting, and video recording. This guide will teach you how to use OBS's Virtual Camera feature to add things like a timer overlay to your webcam.
Steps 1-4 detail the setup of OBS, the virtual camera, and the timer for future use. Steps 5-6 detail the usage. If you've already set this up before, skip to step 5.
1. Installing OBS
OBS can be downloaded for free from OBSProject.com. Download and run the relevant installer.
Once OBS is installed, launch OBS Studio (64bit) in the Start menu (for Windows).
When you first launch OBS, select the option to "only use the virtual camera", OBS will set your settings accordingly. If you want to make sure, you can go to File > Settings to adjust any settings.
2. Creating a scene
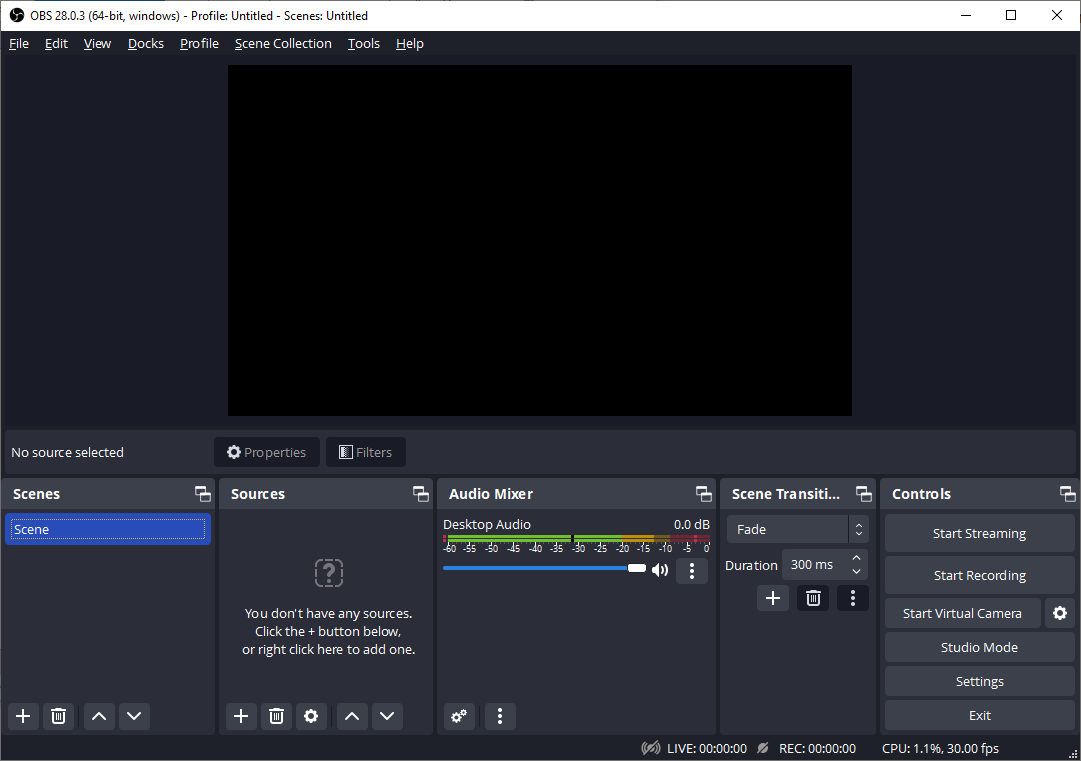
In OBS, whatever you want to output (with streaming, recording, or virtual camera) is organized into scenes. In the above image, the black rectangle is our scene (it is just a black rectangle because we haven't added any sources yet). Everything in this scene will be what is shown in our virtual webcam.
When you install OBS, it should create an empty scene called Scene. We can use this one or create a new one by clicking the "+" button at the bottom the Scenes section in the bottom-left.
3. Add a webcam source
Sources in OBS are the individual elements that make up a scene. Things like a webcam, desktop capture, window capture, image, text, or whatever else you want to put in your scene.
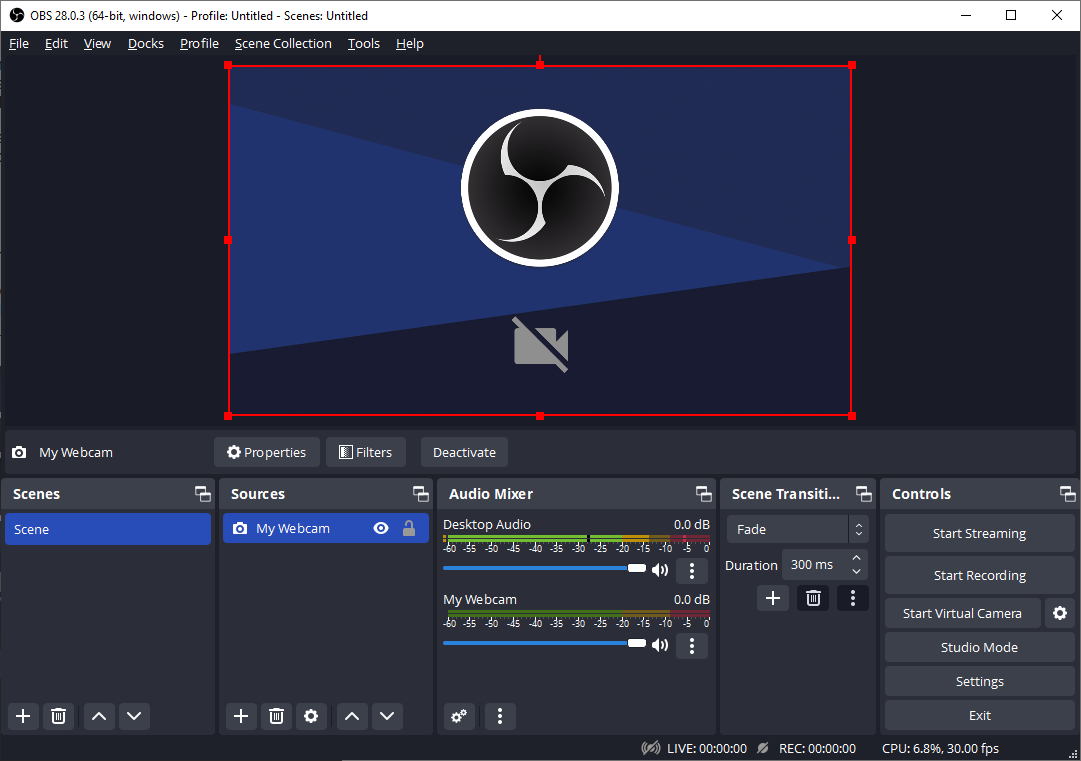
Click the "+" button at the bottom of the Sources section and add a new Video Capture Device. Rename this something that will be obvious at a glance what it is, like My Webcam. Click "OK" to create the source.

The Properties menu for the source you just created will open automatically. If it isn't already, set the "Device" to your normal webcam.
Adjust your webcam to fit the size of your scene. Click on the name of the webcam source in the Sources list or on the preview of the webcam in the scene. A red outline should appear around it. Either click and drag the outline and the element to resize and move it around the scene, or right click on the source name and go to Transform > Edit Transform... Resize the webcam to fit the full scene.
NOTE: If you can't see your webcam in the scene, your webcam may be deactivated. Click on the name of the webcam source in the Sources list and click "Activate" in the bar above. Only one program will use your webcam at a time, so if your webcam is in use by another program first close that program and OBS, then reopen OBS.
4. Add a window capture timer
First, find a timer you would like to use. This can be a website, a program, or any other thing that can be brought up on your computer. In this example I will use this online timer, but any will work. One that can be run in its own separate window instead of a web browser may work better.
IMPORTANT NOTE: Using this window capture method, it is important that we leave this timer in its own, untouched window. If you're using a web browser, seperate this tab from the others to its own window and keep it in the back. Keep the window fullscreen, or at least cropped to a size you can keep consistent.
Click the "+" button at the bottom of the Sources section and add a new Window Capture. Rename this something that will be obvious at a glance what it is, like Timer. Click "OK" to create the source.
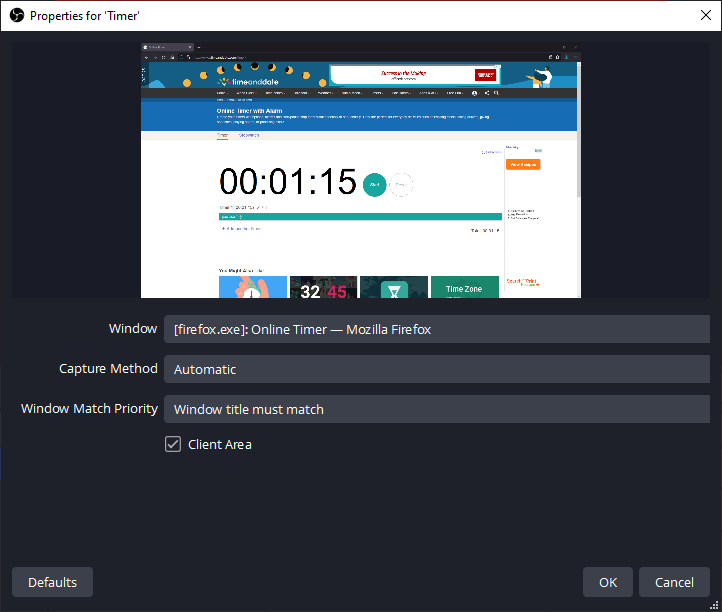
Change the "Window Match Priority" to "Window title must match". This will prevent OBS from instead going to another browser window you have open when it can't find the timer window. Click "OK".
Make this overlay is above your webcam in the Sources list. Sources layer with the uppermost elements on top. Click on the name of a source in the Sources list then use the up and down buttons at the bottom to adjust the order.
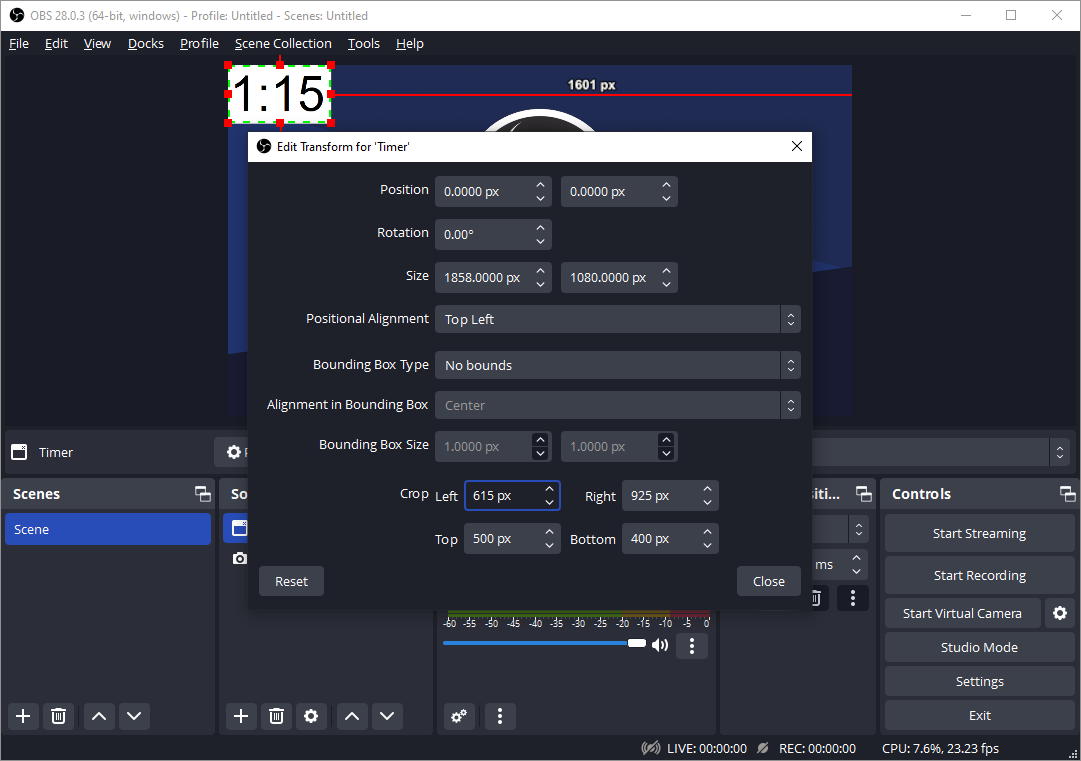
Right click on the timer source name in Sources and go to Transform > Edit Transform... Here you can adjust the "Crop" values to crop this from the entire window to just the timer itself.
In the Sources list at the bottom of the screen, the eye button next to the name of a source toggles whether that source is visible or not.
4a. Add keyboard shortcut (optional)
With OBS, you can set a keyboard shortcut to hide or show a source, to switch scenes, or to do other things. We can set a shortcut to show/hide our timer.
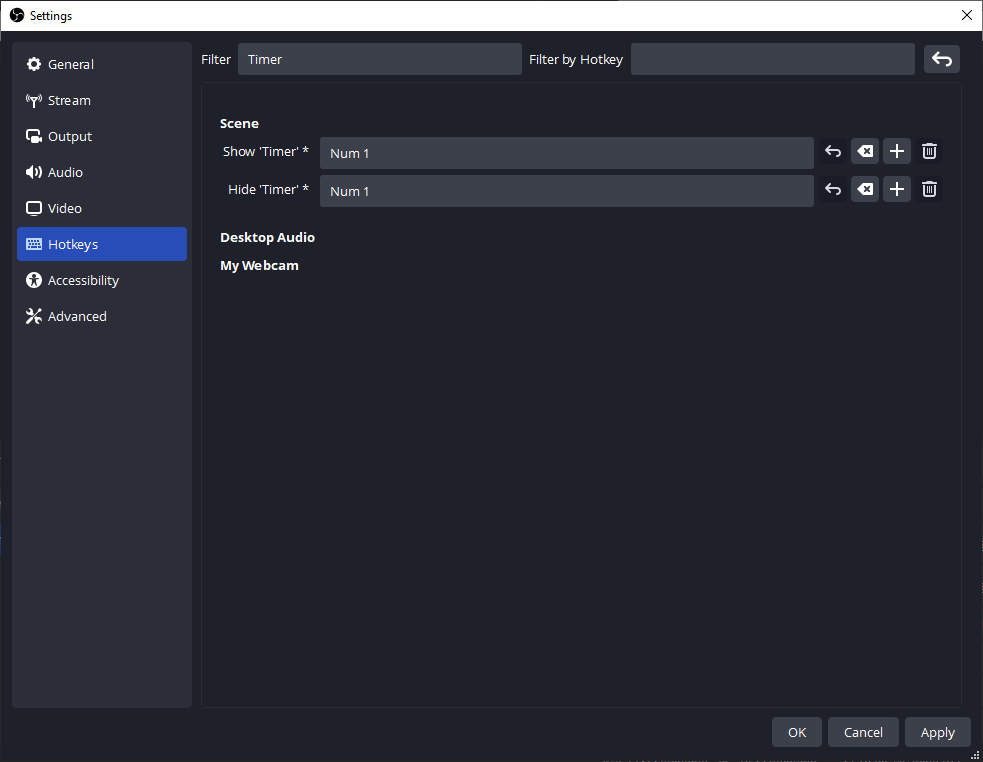
To do this, go to File > Settings > Hotkeys. Scroll through the list or use the "Filter" box at the top to find the "Show 'Timer'" and "Hide 'Timer'" hotkeys. Click the box for each of these and set them to the same key. Click "OK".
From now on you can use that keyboard shortcut to toggle the timer source.
5. Using OBS virtual camera
OBS can be used as a virtual camera, meaning whatever is in your scene can be used in place of your webcam.
First, make sure no other programs that are using your webcam are open. Open OBS and go to your scene.
In the Controls section at the bottom-right of OBS, click the "Start Virtual Camera" button.
In Skype, Teams, Zoom, or whatever other video conferencing software you are using, go to your settings and set your video input to OBS Virtual Camera. You are now using your OBS scene as your camera for the call.
6. Using the timer
Open your timer in its own window. Make sure it's in the same configuration as when you set it up (the window is fullscreen or resized the same way).
When you are ready to use the timer, use the keyboard shortcut set up in step 4a or the eye button next to the source name in the Sources list to make the source visible and show the timer. Repeat this to hide the timer.